


How to Upload a File Using the File Manager?
You can upload your files directly through cPanel using the File Manager. File Manager is a web interface that allows you to manage all files associated with your account.
The following video demonstrates some common tasks that can be accomplished with File Manager, including uploading, renaming, and deleting files.
The File Manager may look slightly different depending on the version of your server's cPanel; however, the functionality described in the video is the same. You may notice that some of our pictures will include our partner brands like Hostgator, Microsoft, Hulu and others.
How to upload files using File Manager
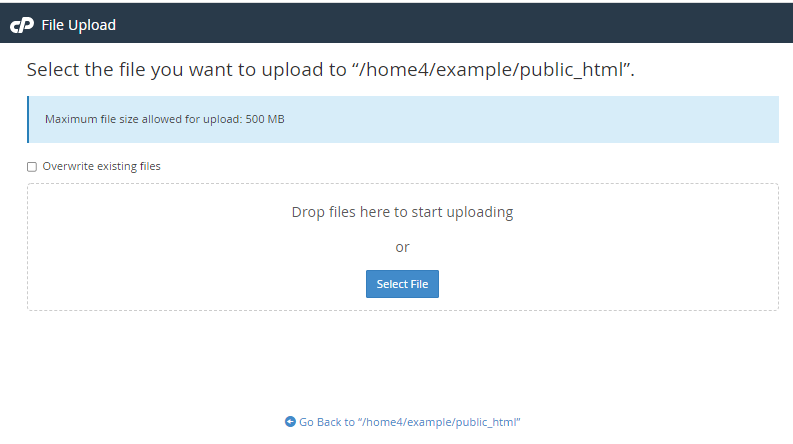
To upload a file in File Manager:
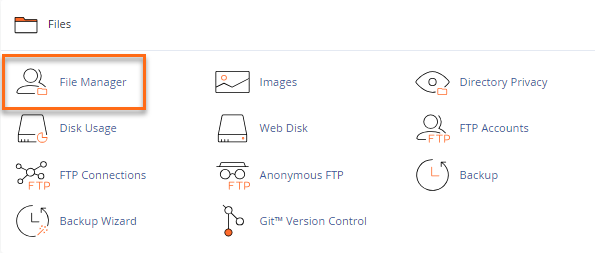
- Log in to cPanel.
- In the Files section, click File Manager.
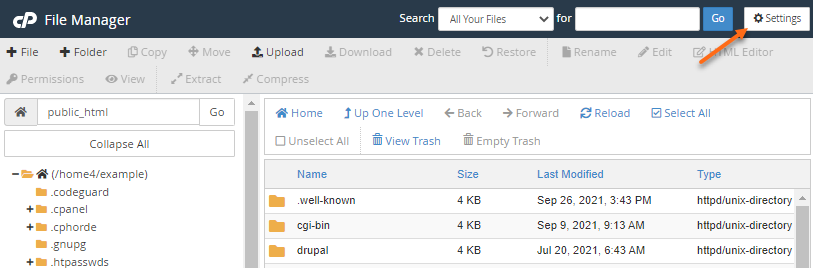
- In the upper right-hand corner, click on Settings.
- Select Web Root and Show Hidden Files (dotfiles), then click Save.
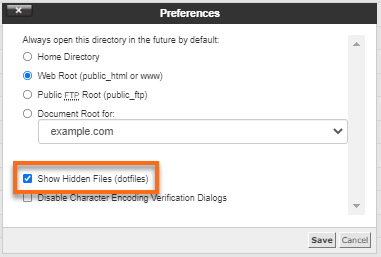 Web Root will take you directly to the folder in your hosting account that is visible to the world wide web. This is typically the public_html or www folder and is where your website files will need to reside.
 - Locate and click the folder where you'd like to upload files.
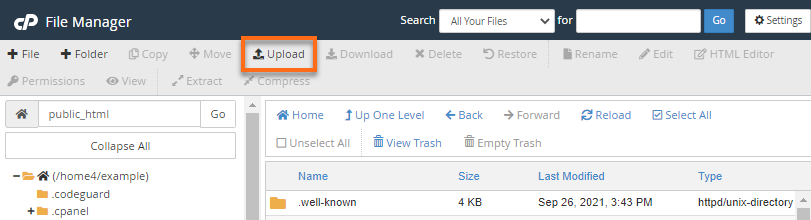
- Once inside the folder, click on Upload located at the top toolbar.
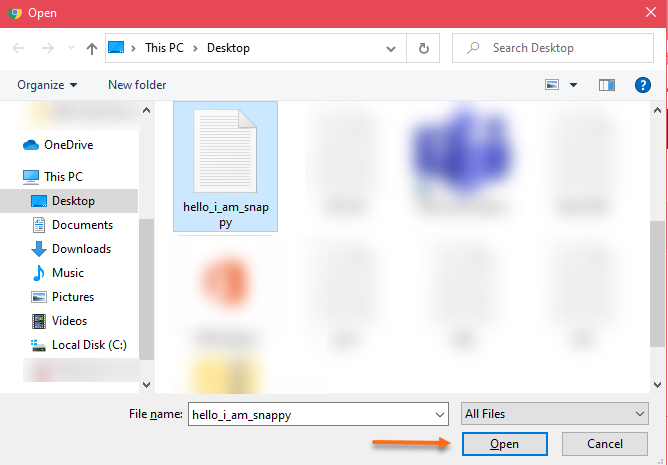
- Click Select File (some web browsers will have Choose File instead).
- Select the file you wish to upload from your computer, then click the Open button to initiate the uploading process.
- You may select additional files while the upload is in progress.
Note: There is a 500 MB upload limit through File Manager. If you need to upload a larger file, please use FTP.

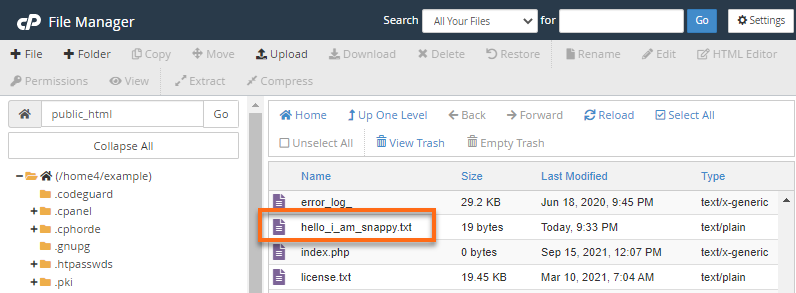
- The uploaded file should now show in your folder.
After uploading files to your server, you may wish to share them over the internet. To learn how to find the shareable URL for your uploaded files, please check out the article, How to Find the URL of a File.
